Welcome to the Quality Assurance Global Best Practices question and answer session.
Taking audience questions in this session is Giuseppe Grimaldi, our Quality Assurance Product Manager at Atlas Copco. In this Q&A, we’re exploring the best Quality Assurance global practices that we’ve collected from our customers. Giuseppe begins the Q&A by listing out the six global best practices: initial tool verification, routine residual online verification, reactive dynamic online verification, routine dynamic online verification, routine tool transducer calibration, and routine plant standard calibration. Together these practices make for “best in class in quality.”
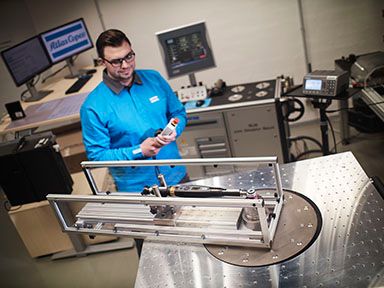
The first question is about how a plant can verify tools before they enter the plant population. According to Giuseppe, this question relates to the first pillar: Initial tool verification. The tool is placed on top of a transducer, which reads the torque output, letting you know whether it’s on target. When asked why tools and joints are classified, Giuseppe says that certain joints hold more importance than others. For joints that require high attention, they also require high quality. This identifies risks for manufacturers and allows them to keep an eye on the joint. A question is asked about a Cm/Cmk test, and Giuseppe explains that it assesses the tool accuracy and repeatability. SPC tests collect samples and statistical trends that can be easily examined. Residual torque checks use manual wrenches to tighten an already tightened joint. When the joint moves again, that is the residual torque left on a joint.
We then begin talking about the difference between dynamic and static torque. Dynamic torque is the torque applied continuously. Static torque refers to the torque that is left on the joint at the end of the tightening. The breakaway point is the peak in torque and the point in which we apply more torque than the static friction left on the joint. When asked how often a tool should be tested, Giuseppe says that it depends. He lists out three parameters that influence how often tools should be tested. We should ask these questions: What is the joint classification? How many times is the tool alerting that it’s failing? And how many cycles does the tool perform? When asked how often tools should be calibrated, Giuseppe recommends using the three parameters and questions to find out the answer.
On that subject, Giuseppe explains the difference between calibration and validation. Validation refers to collecting data points to see how consistent the values are. Calibration is comparing results with what the tool is telling you and readjusting to meet standards. In the final part of the Q&A, a question is asked about the main causes of a NOK joint. Giuseppe goes into the six variables, also known as the Six Sigma, that can influence tightening processes and results. These variables are method, mother nature, man, measurement, machines, and materials. When asked what a control chart is, it is explained that a control chart plots results related to a process and operators can see the evolution of those results in time. To find out more about what was asked and how Giuseppe answered, tune in to the Q&A session now.
Tune in! For this question and answer session, Quality Assurance Product Marketing Manager Giuseppe Grimaldi took your questions about Quality Assurance and global practices. Watch on-demand now:


